
Last week when I shared 5 simple steps to starting a blog, I mentioned the importance of installing Google Analytics. This is a great (and powerful) tool that can not only gauge your growth but give you valuable insight into your readers, traffic sources, and much more. There’s lots of reports you can generate that can really help increase your traffic if you interpret them correctly. However, this post is just for those of you looking to get started on how to setup Google Analytics in WordPress AND Blogger (I’ve gotten several emails about setting up Google Analytics, so hopefully this is helpful to a few of you!)
In this post, I will show you how to correctly sign up for Google Analytics, and then correctly install it in both in Blogger or WordPress.org.
Signing up for Google Analytics
Anyone can sign up for Google Analytics. First off, go to http://analytics.google.com, and in the upper right corner, select “Access Google Analytics.”

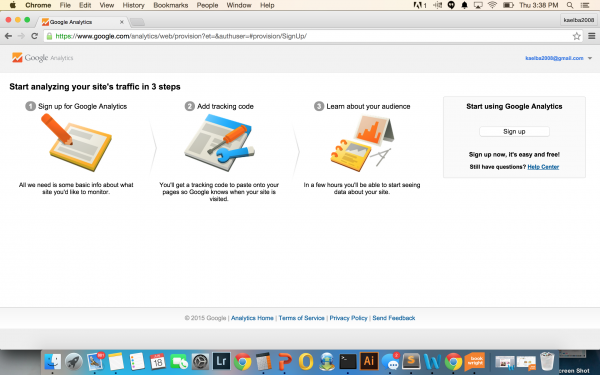
As long as you haven’t set up a Google Analytics property before, you will be brought to this screen. Click on the “sign up” button.
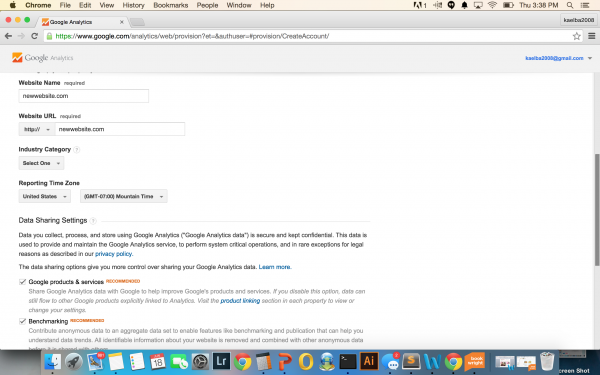
Write all your information here – the name and URL of your website, industry, time zone, etc. After you fill out all this information, you will be able to create your new profile at the bottom of the page.
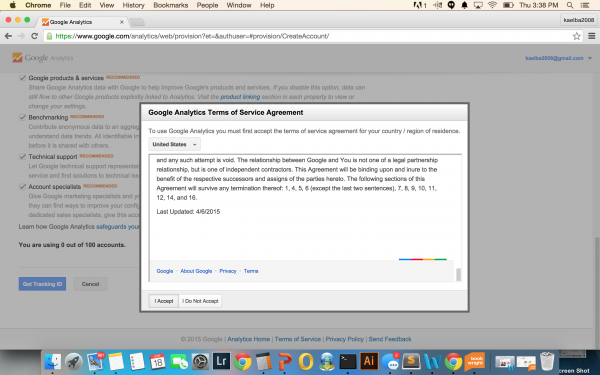
Once you click on “Get Tracking ID” you will be prompted to accept the Google Analytics Terms of Service agreement. Press “I Accept” (assuming you do!)
Then you’ll be brought to this page where you will be given both your tracking ID number and the tracking code. Depending on what method you use to install Google Analytics on your site, you will use one of these codes. The tracking id is the shorter version, and the tracking code is longer.
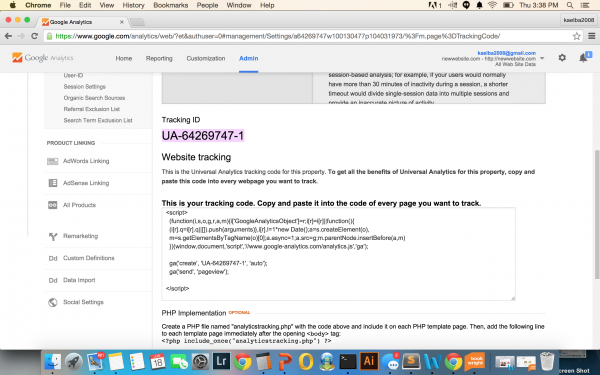
Don’t feel like you have to write these down right away – you can always access them again by going to Admin (at the top of the page, pictured in blue below.) After you click on that, in the center column is something that says “tracking info.” That’s where the information you need can be found!

Installing Google Analytics in WordPress
Now that you are all set up, it’s time to install your tracking code on your site. In WordPress, there are a couple of different ways to do this – it may vary depending on your theme.
Installing Google Analytics in site <head>
Your code needs to be installed in the <head> of your site. This can usually be found in the header.php file of your site (which can be access through Appearance – Editor.) However, unless you feel comfortable editing your website’s files, this can be tricky.
If you are using a StudioPress/Genesis Theme (which I highly recommend doing – it makes life easier), then you can easily paste the Tracking Code (not the tracking ID – the tracking ID is just a few numbers) here. Just go to Genesis – Theme Settings an scroll to the bottom of the page. There is a section that is called “Header and Footer Scripts.” Paste the code there, press save settings, and you should be good to go!

If you don’t have Genesis, your theme may have something similar. Just search Google really quick to see. Otherwise, you can install the plugin Header and Footer, which is similar in function to the Genesis header and footer script boxes. Once you install this plugin, it will appear under the WordPress “Settings” section of your site. You can place the Google Analytics tracking code in the <head> section, and you should be good to go.
Google Analytics Plugin
As a general rule, I think that if you can avoid using a plugin on your site, you should. The one I mentioned previously, Header and Footer, is generally pretty lightweight, and it can be very helpful for putting other code in your site. However, many people prefer to use a Google Analytics plugin – some of the ones out there will show you directly on your post dashboard how many page views you are getting, and they can be helpful. A plugin might just be the simplest choice for some.
I would recommend using Google Analytics by Yoast (the free version is just great!) After you install this on your site, it will show up toward the top of your WordPress dashboard, like this:

Select Dashboard. When you get there, it will say “We need you to authenticate with Google Analytics to use this functionality. If you set your UA-code manually, this won’t work. You can authenticate your Google Analytics profile here to enable dashboards.” Click on the part that says authenticate your Google Analytics profile here. This will give you the option to connect directly to your Google Analytics profile (assuming you are logged into the account connected to it!) There are some other settings in this plugin, but for now, you should be set.
Installing Google Analytics in Blogger
One of the biggest issues I see when I move people from Blogger to WordPress is that they have Google Analytics installed twice on their site. Make sure this doesn’t happen to you! There are a couple of different ways to install Google Analytics, and these are the two I recommend. Remember to pick just one! Often people will install it in their layout area in a widget, which I really don’t recommend doing…so use one of these methods instead!
Installing via Settings
This is by far the easiest method. For it, you will need your tracking code (which looks like this -UA-xxxxxxxx-x…with numbers instead of x’s.)
Go to your Blogger Dashboard and from the dropdown menu, select settings: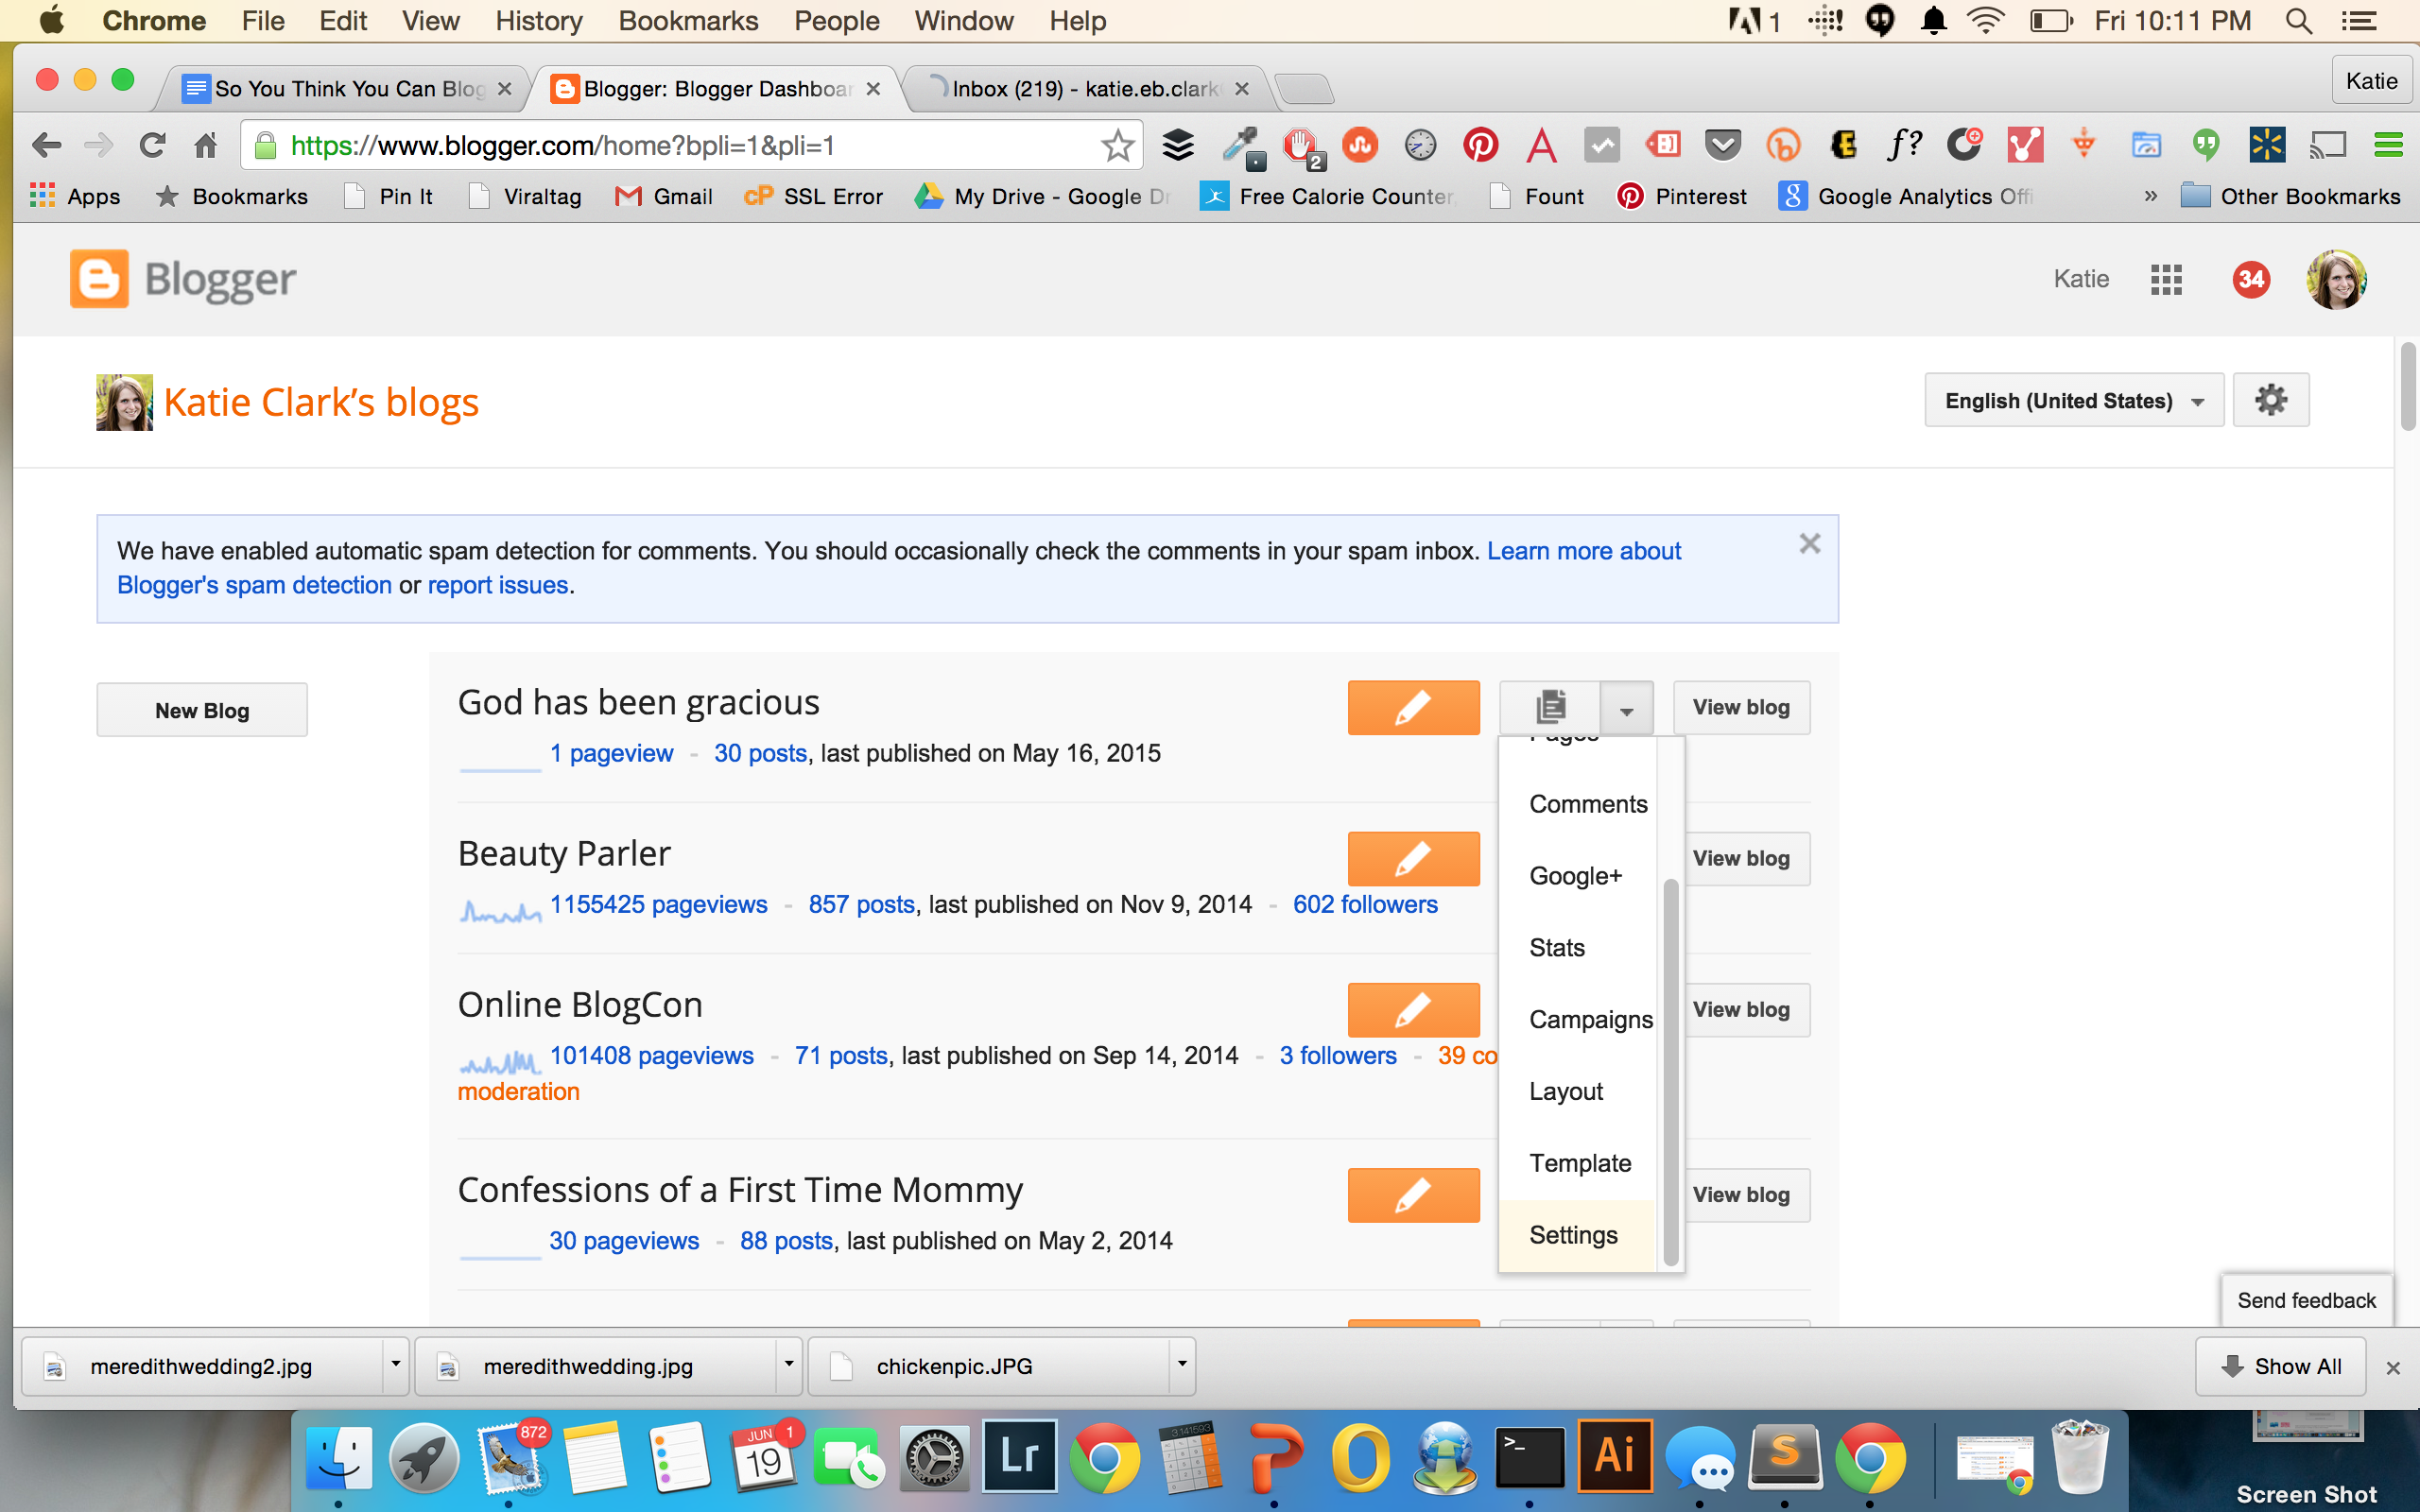
It will take you to the general settings page, but there will be several options underneath settings on the left side of the page. Select “other” and scroll to the bottom of the page. At this point, you can post your tracking ID. Just put it there, press save settings, and you’re done!

Installing Google Analytics in site <head>
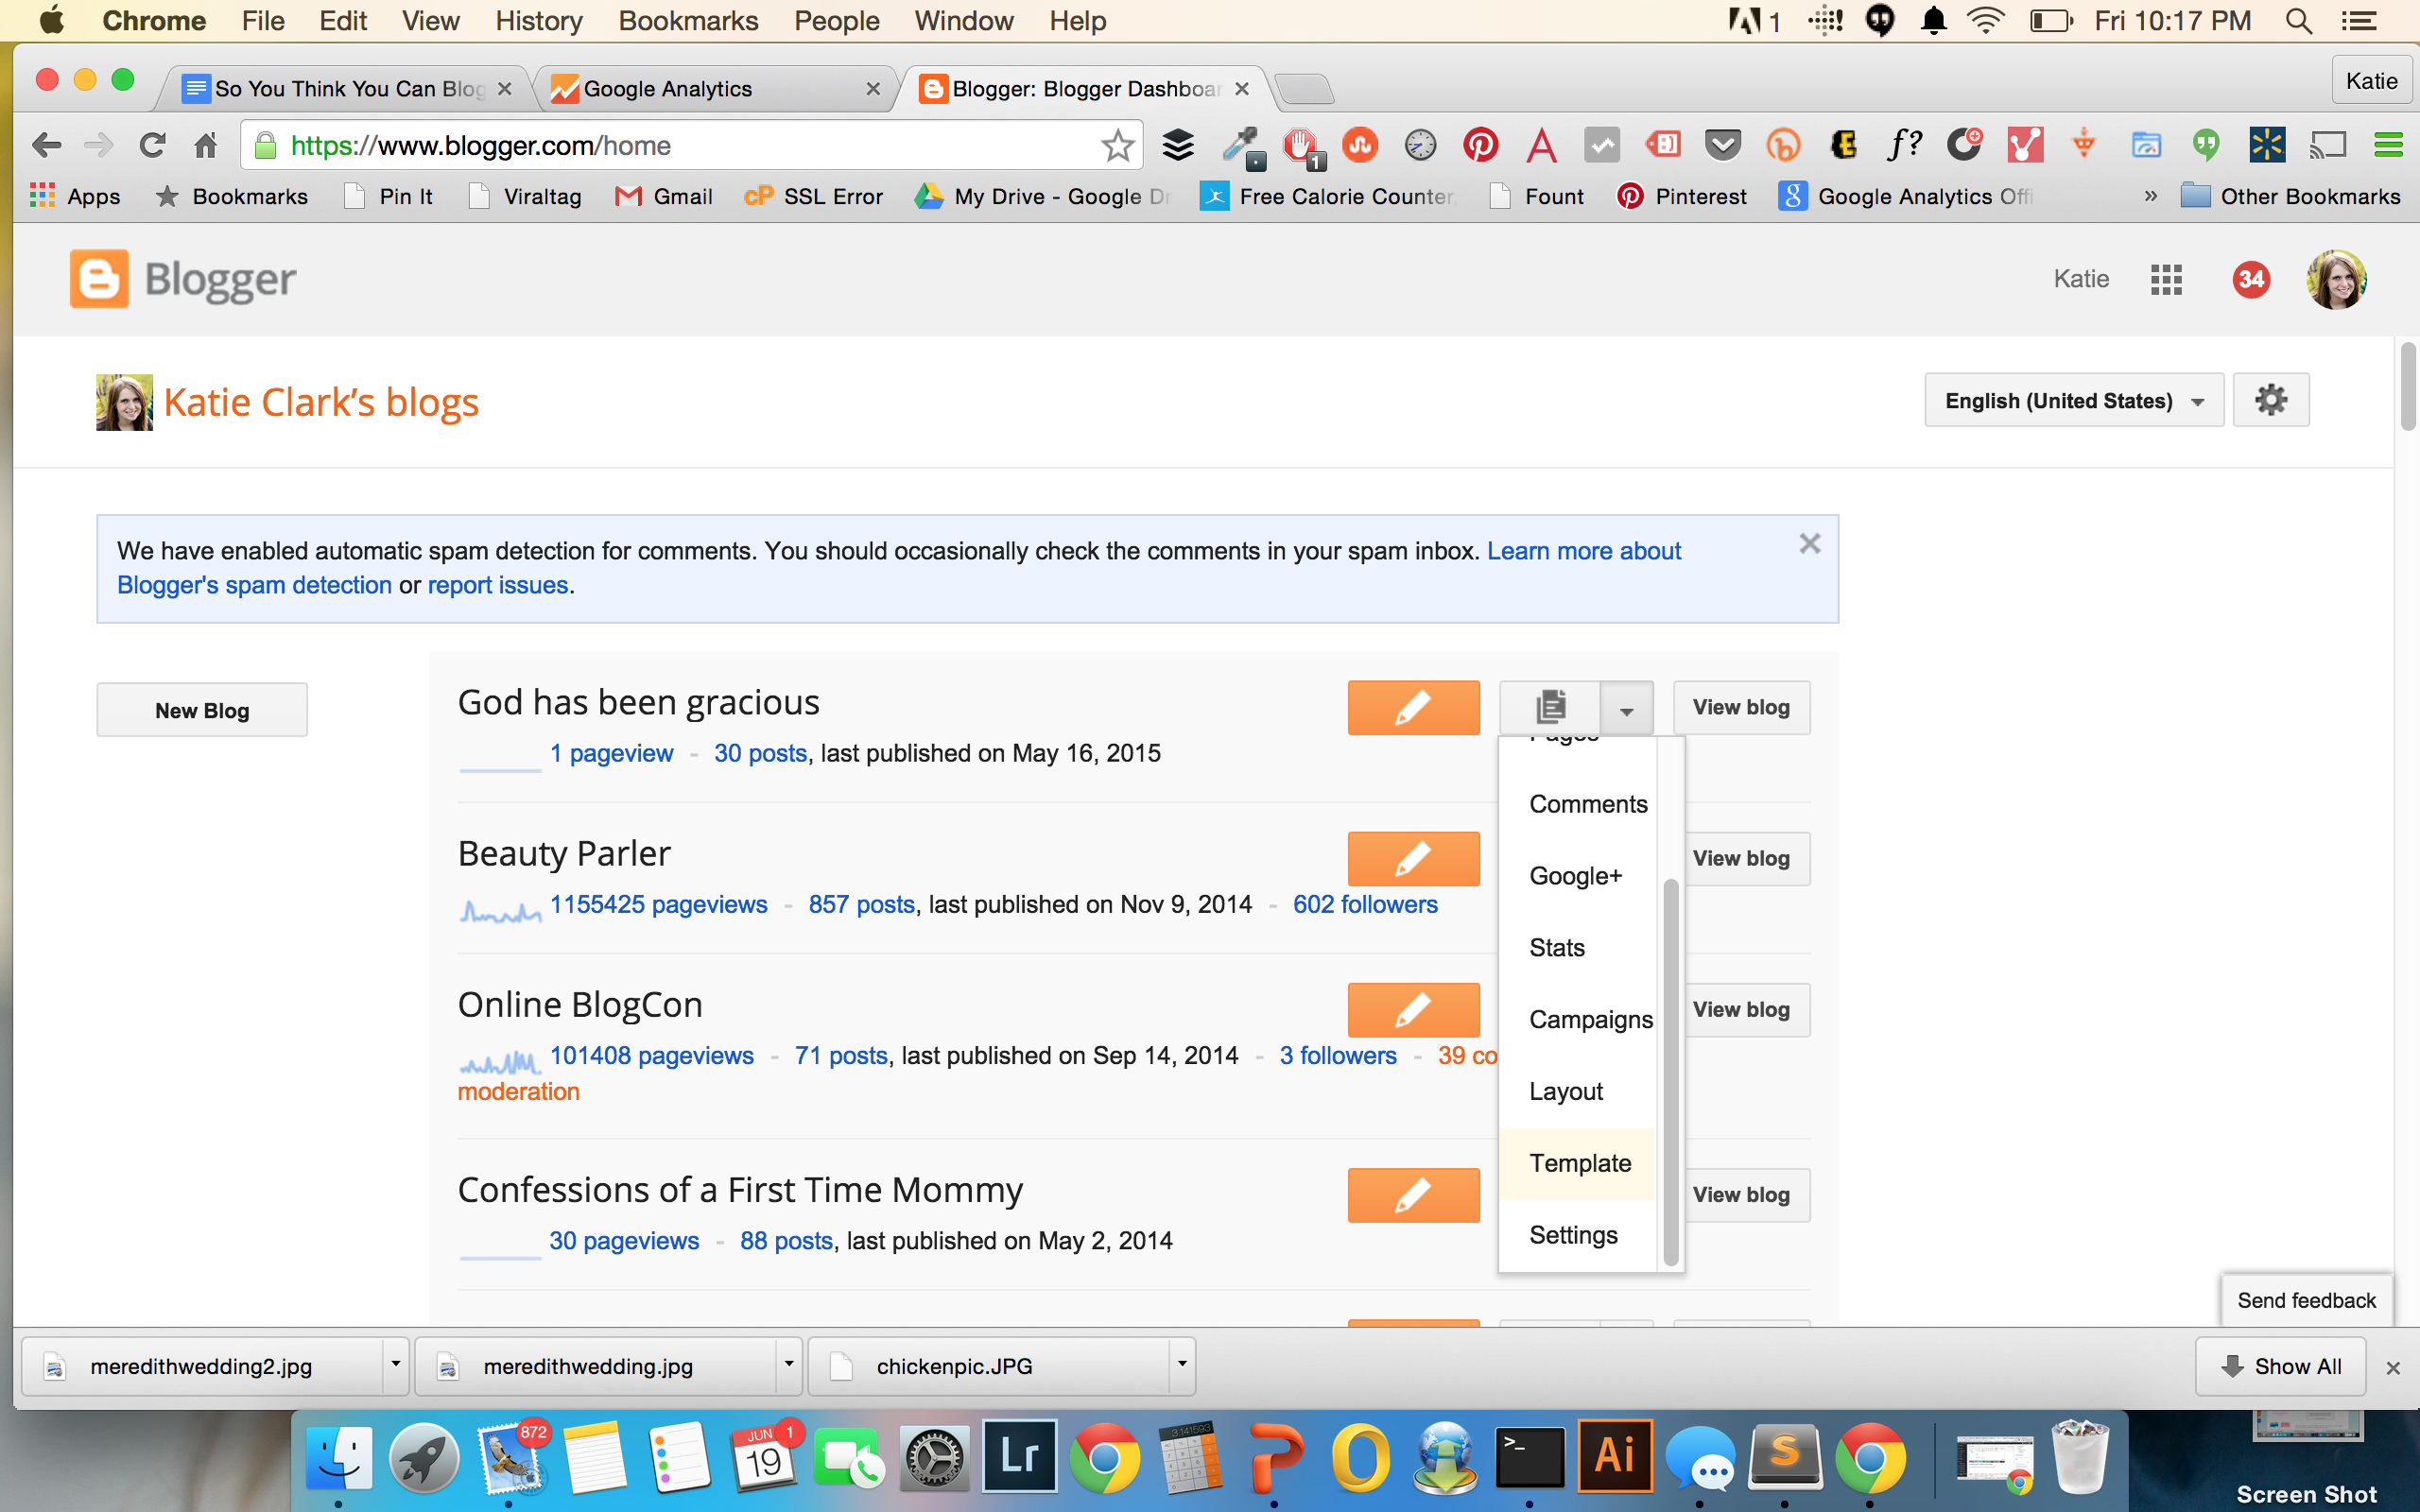
The next method involves using your tracking code (not the ID). Login to Blogger and in the drop down menu next to your site, select “Template”
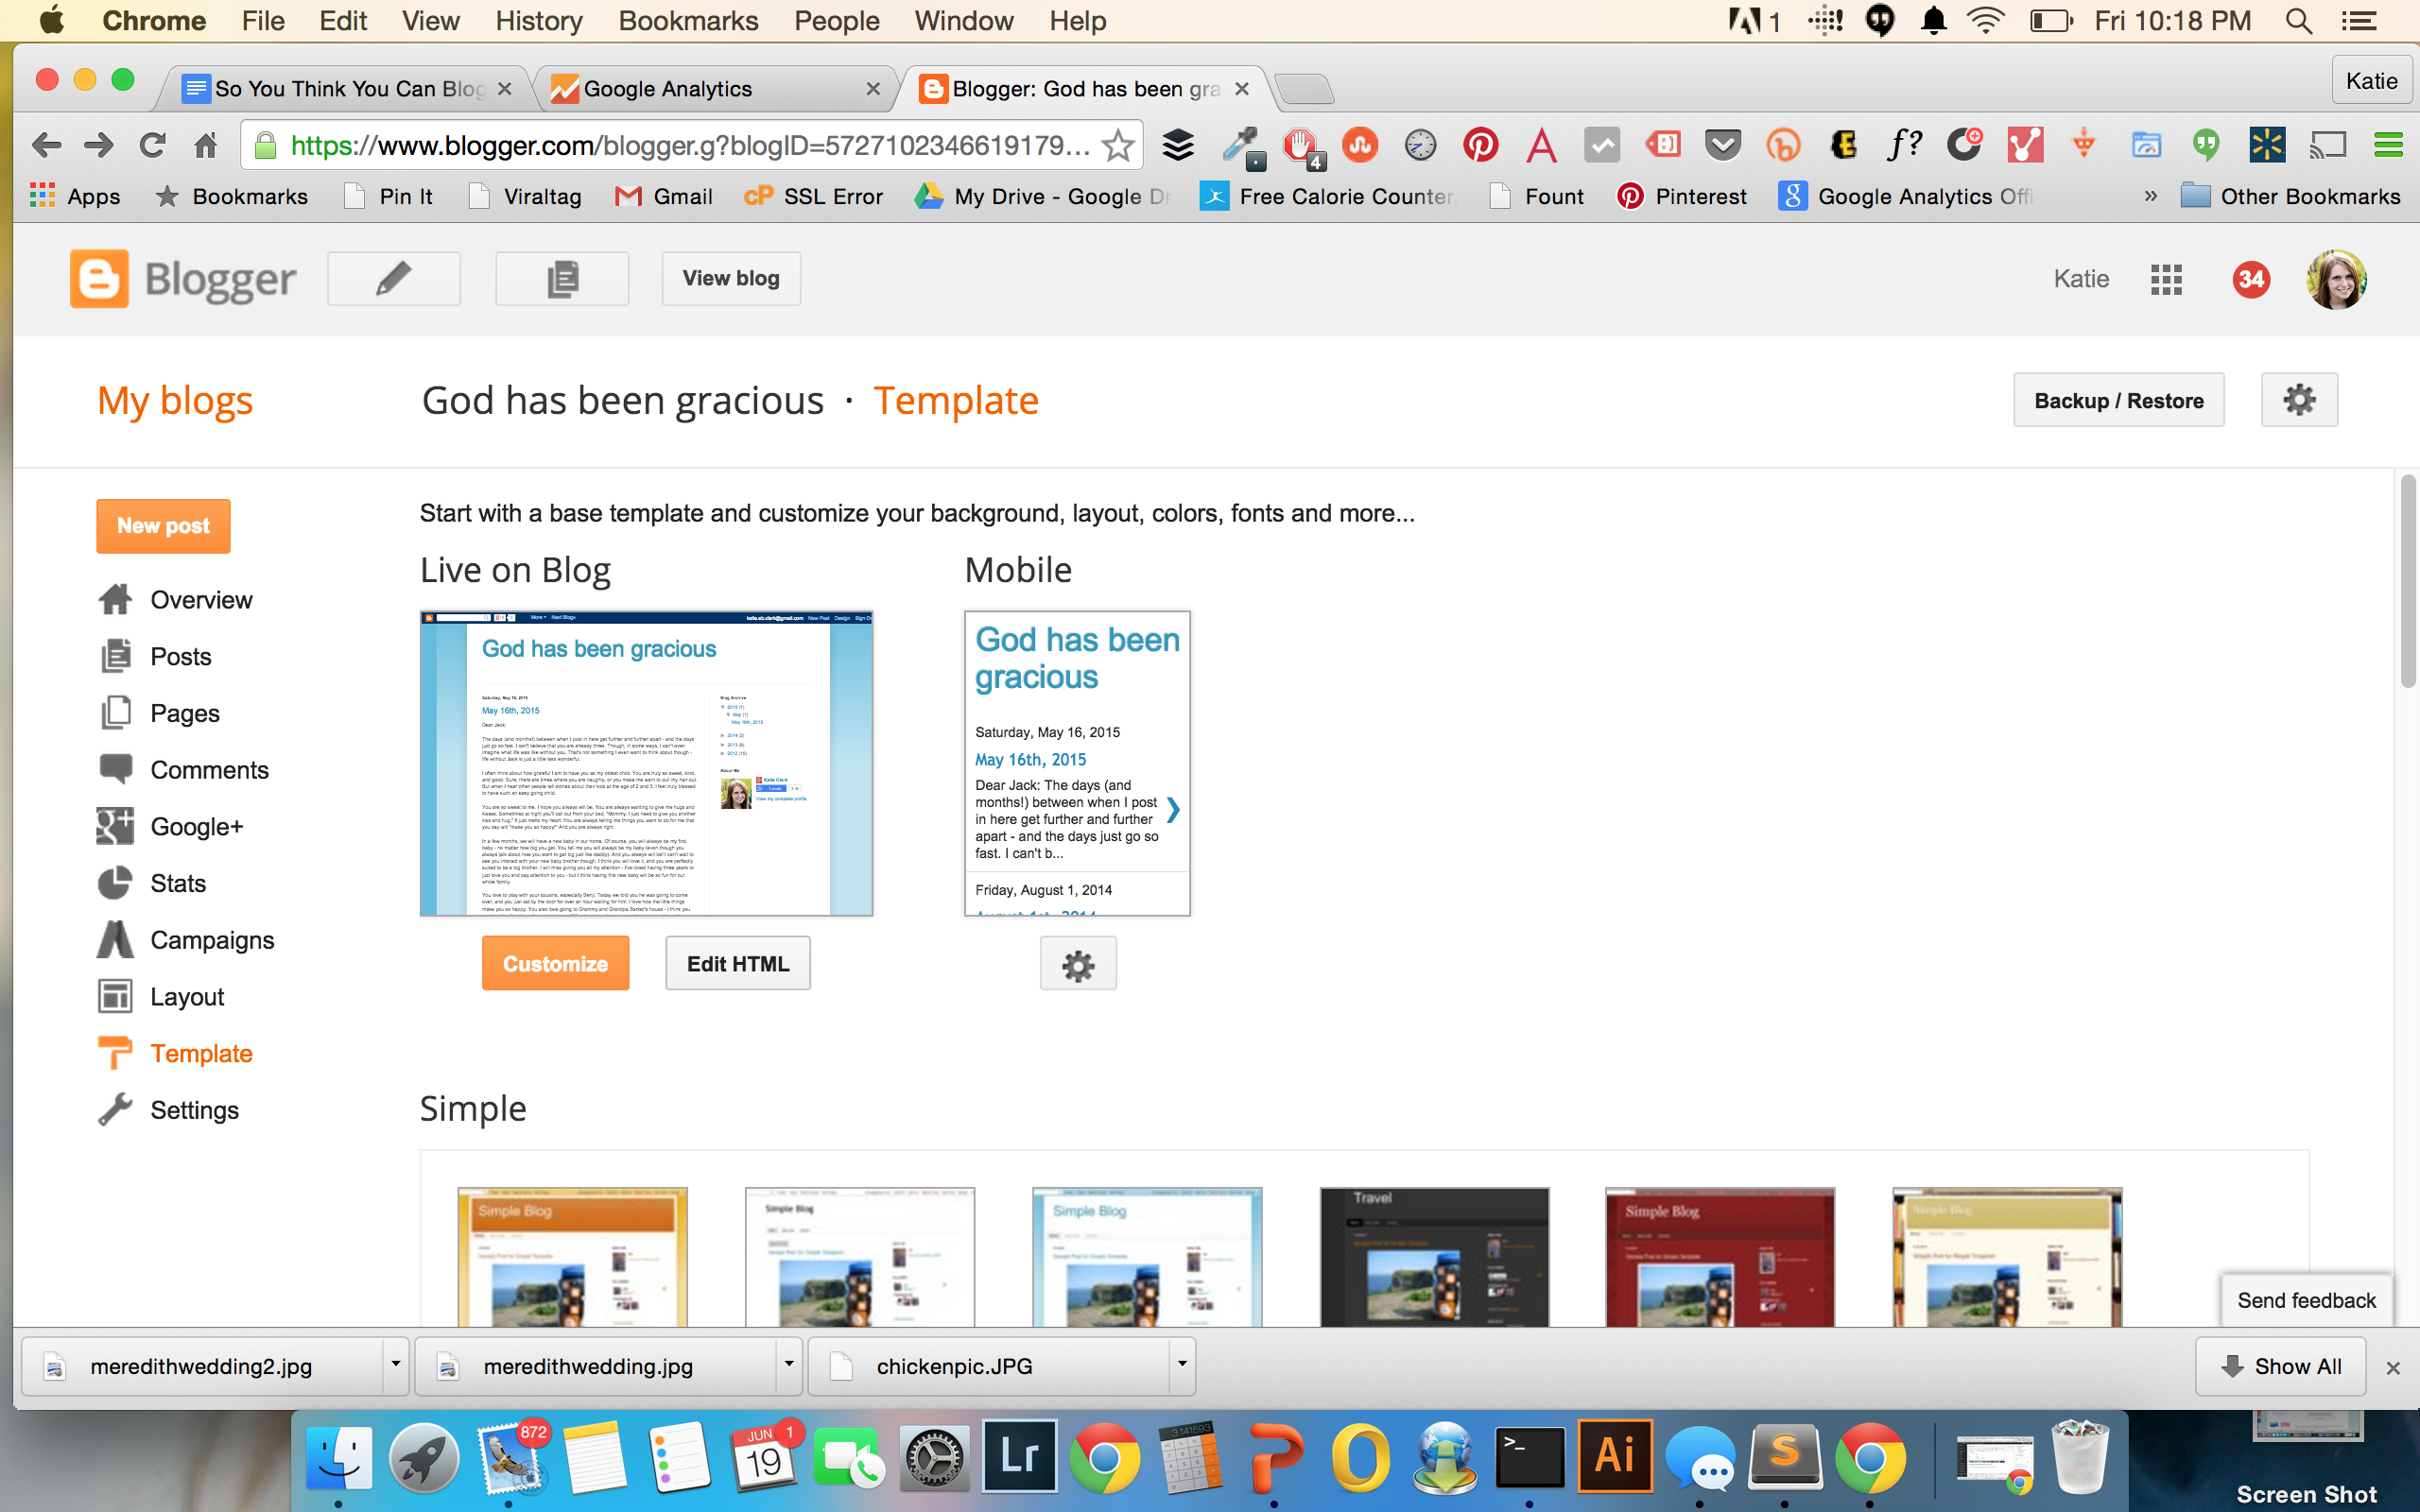
On the next page, you will select “Edit HTML”
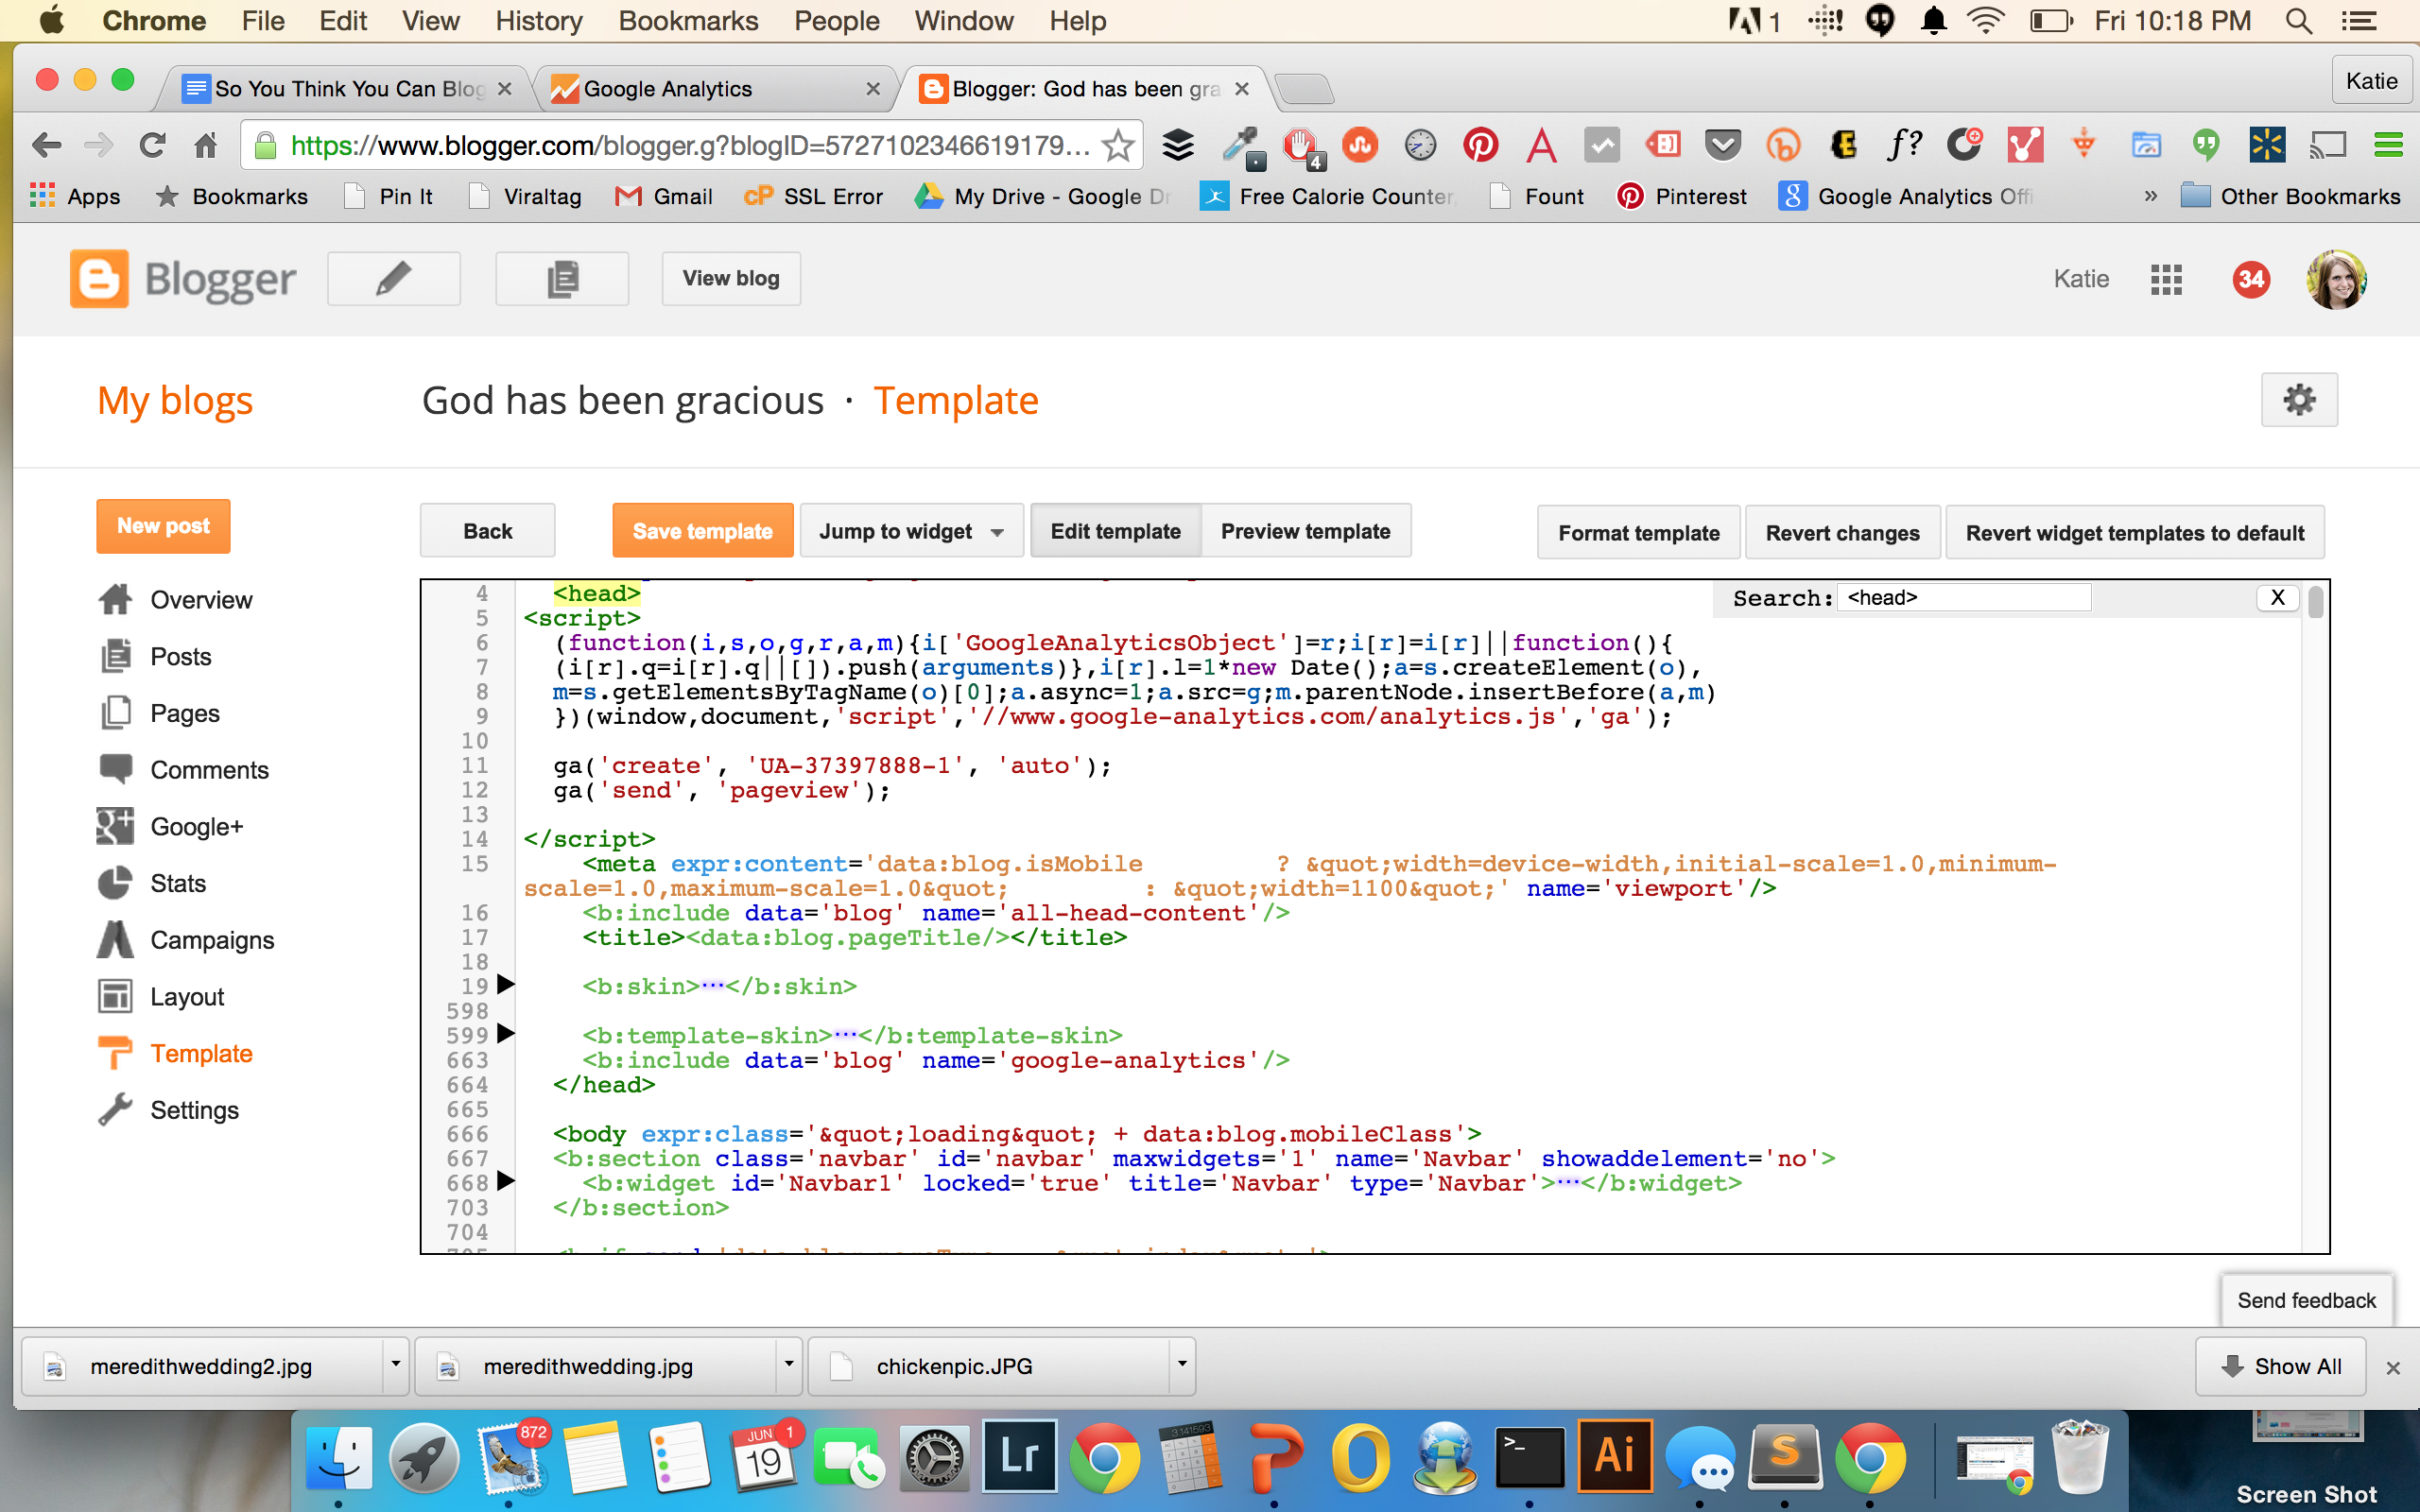
And on this page, you will want to find the <head> tag in all this code. You can either scroll, or you can click in the box with all the code and press either ctrl+f (in Windows) or command+f (in Mac) and search for <head>. Directly underneath that opening tag, add your Google Analytics tracking code, as seen below.
Now hopefully you were able to successfully install Google Analytics! Let me know if you have any questions!
